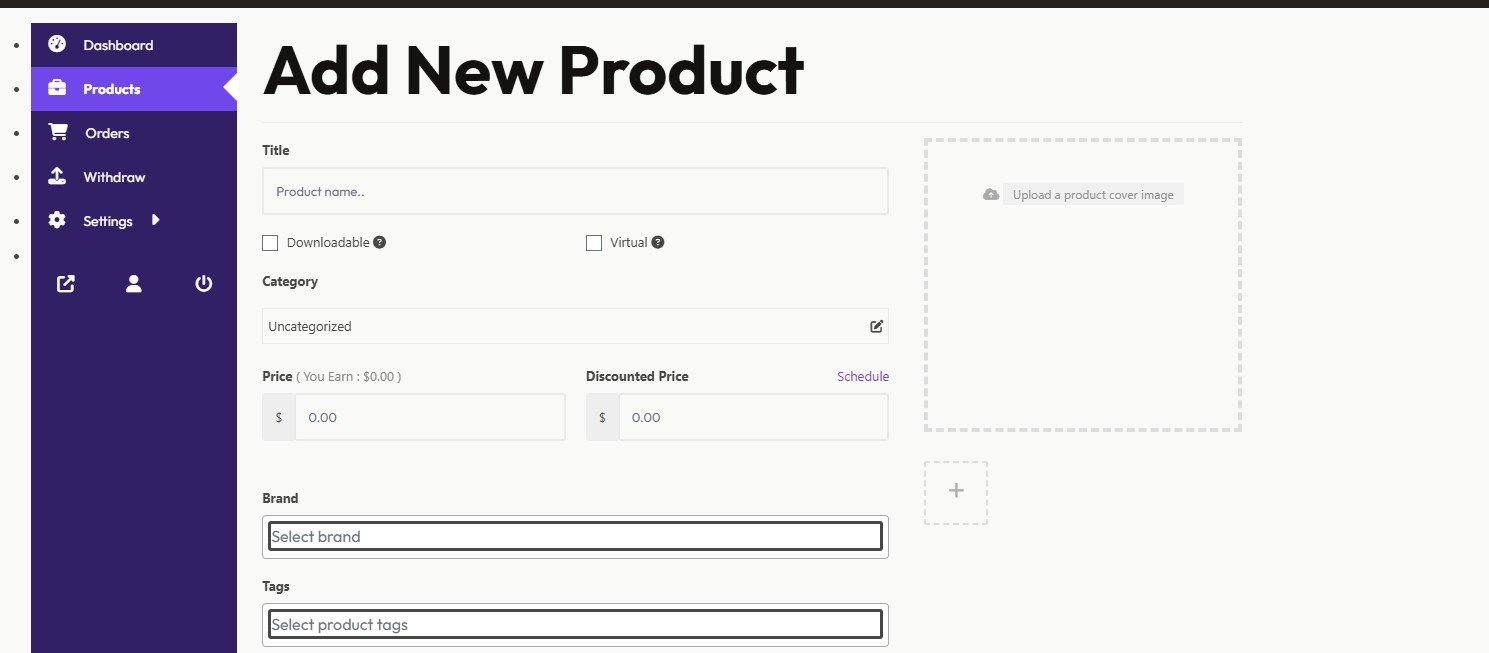
Now go ahead and fill out the details for your product. Let’s go through each field.
The “Title” field should be the name of your product or service. If you are looking for work and want to utilize this marketplace to get paid to do different tasks you can label the product as “[Your First Name] – Looking For Work Looking To Perform Tasks”.
On the right, you will upload an image of the product or service. If you are looking for work you can post an image of yourself. When the image asks you to crop it – you may want to “Skip cropping” as this can sometimes run into an error.
You can choose if the product is “Downloadable” (for example, if you are selling an eBook). This means you can attach this product to the order for the consumer to download when they purchase the product. You can also check the “Virtual” box if the product or service is not physical.
Under “Categories” you can choose a category if it fits your product or service otherwise you can choose “Uncategorized”.
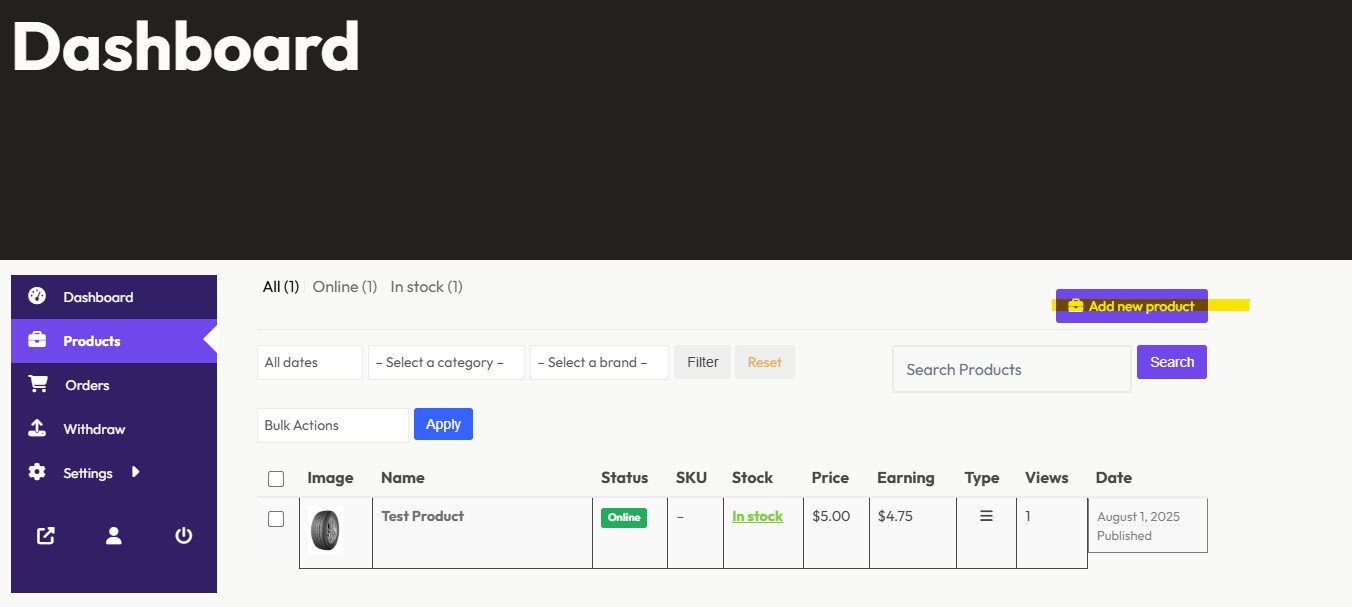
“Price” is the amount of money you want to charge for the product or service. Our team will take 5% of what you sell the product or service for. You will see the “You earn” portion that indicates how much you will actually earn. When selecting a price, you should factor in shipping and sales taxes to ensure you can make a profit.
“Discounted Price” is a lowered price from the original price. If you choose to fill this in, you can schedule how long you want this to run for.
Under “Brand” you can choose a Brand if it fits your product or service otherwise you can leave it blank.
Under “Tags” you can choose a tag if it fits your product or service otherwise you can leave it blank. This helps consumers find your product not just by the title but by keyword.
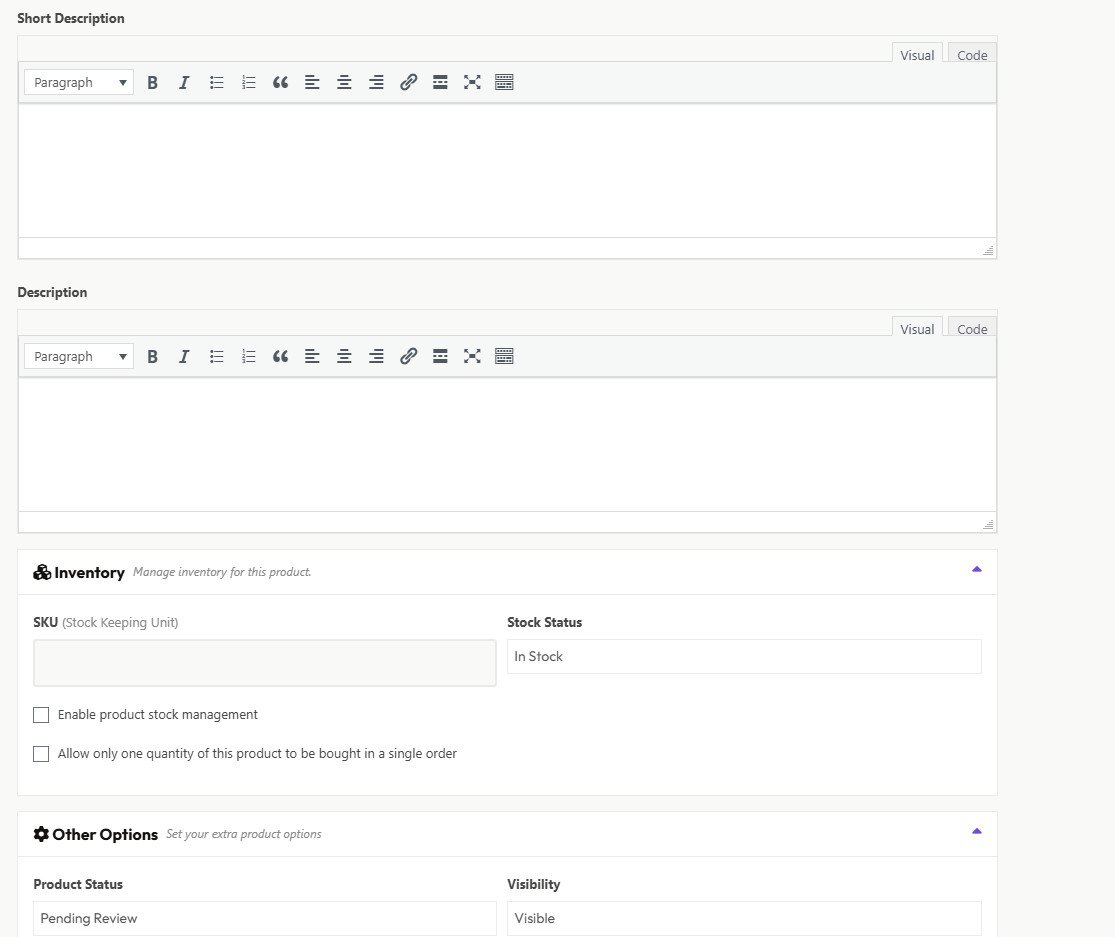
“Short Description” should be an overview of the product or service.
“Description” should be all details of the product or service.
For “Inventory” you can choose “Enable product stock management” if you have more than 1 quantity of the product or service available in Inventory. This will make it so if someone purchases less than your stock of inventory the product will continue to be available. You can also select “Allow only one quantity of this product to be bought in a single order” if you only want someone to be able to purchase 1 quantity of the product at a time. The “Stock Status” can also be changed as needed.
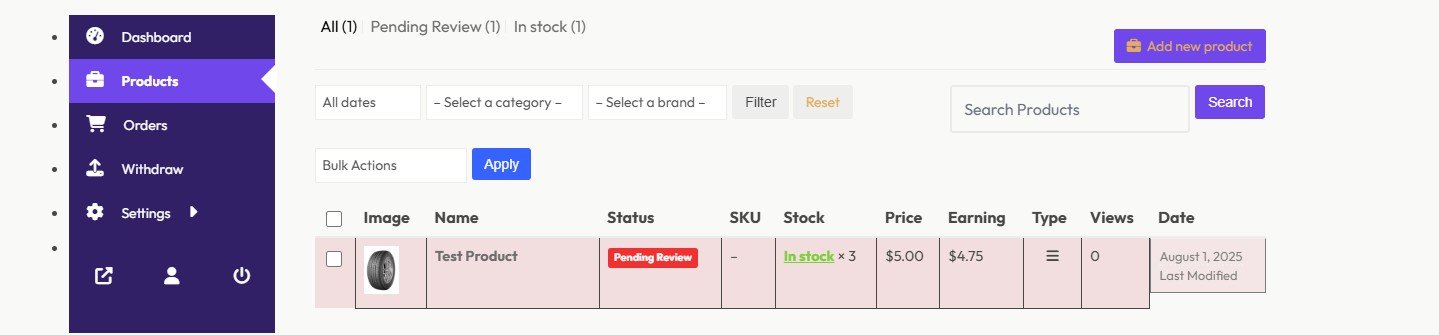
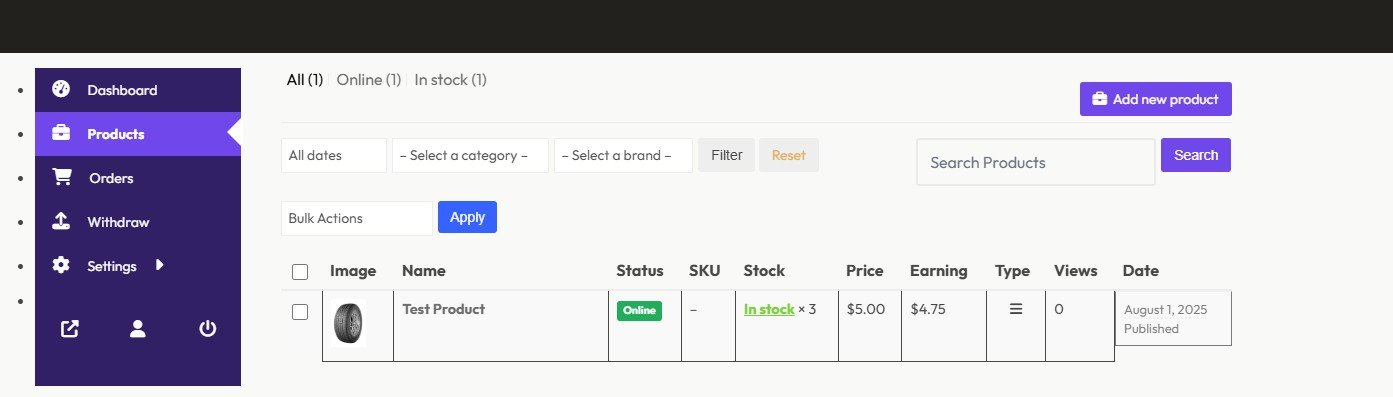
The “Product Status” will be “Pending Review” when you click submit and will not moved to a “Published” status until we review your product and approve it.
“Visibility” – you can set to Visible.
“Purchase Note” you can fill out any additional details you want to customer to receive upon purchasing the item.
“Product Reviews” you can enable if you want customers to be able to leave reviews on our product.
Lastly, hit “Submit” and your product will go into a “Pending” state until our team reviews it and approves it.